Key Takeaways
- Polish Kielbasa Burgers bring a unique twist to traditional burgers by combining smoky, garlicky kielbasa with bold flavors and creative toppings.
- The recipe involves turning Polish kielbasa into patties, enhanced with ground pork, seasonings, breadcrumbs, and egg for texture and flavor.
- Proper preparation steps, like chilling patties and toasting brioche buns, ensure a perfect balance of taste, texture, and presentation.
- Layered toppings such as sauerkraut, pickled red onions, spicy mustard, and Swiss cheese elevate the flavor profile while complementing the smoky kielbasa patty.
- Tools like a food processor, food thermometer, and cheese-melting dome streamline the process for consistent and professional results.
- Serving suggestions range from classic fries or potato salad to creative sides like grilled vegetables or red cabbage slaw, making the Polish Kielbasa Burger versatile for any dining occasion.
Who says burgers have to stick to the same old beef patty formula? When I first thought about combining the smoky, garlicky goodness of Polish kielbasa with a burger, I knew it was going to be a game-changer. This recipe is all about taking the bold flavors of kielbasa and giving them a fun, bun-loving twist.
Polish Kielbasa Burger: Sausage Meets Bun
I’ve always believed that burgers are the perfect canvas for culinary creativity, and this Polish Kielbasa Burger has quickly become one of my favorite creations. The star of the show is, of course, the Polish kielbasa—rich with smoky, garlicky flavor that truly elevates the usual burger experience. If you’re ready to take your burger game to the next level, follow these steps to build this unique and delicious masterpiece.
Step 1: Prepare the Kielbasa
Grab 1 pound of Polish kielbasa from your local butcher or grocery store. You’ll want to remove the casing, which makes it easier to form into patties. Slice the kielbasa lengthwise, peel off the casing, and roughly chop it into small chunks. Transfer the chopped kielbasa to a food processor and pulse it until it reaches a coarse, ground-meat texture. Be careful not to over-process—you’re looking for texture, not paste.
Step 2: Create the Patty Mixture
In a large mixing bowl, combine the ground kielbasa with 1/2 cup of plain breadcrumbs and 1 large egg. The breadcrumbs and egg will help bind the patties together while keeping them moist. Add 1 teaspoon of smoked paprika and 1/2 teaspoon of black pepper to enhance the smoky flavor. Using your hands, mix everything together until just combined.
Step 3: Shape the Patties
Divide the mixture into four equal portions and shape them into burger patties about 4 inches in diameter and 1/2-inch thick. Press a slight dimple into the center of each patty—this prevents them from puffing up while cooking. Place the patties on a parchment-lined plate and refrigerate for 15 minutes to help them firm up.
Step 4: Grill the Patties
Preheat your grill to medium-high heat, around 375°F to 400°F. While the grill heats up, lightly oil the grates to prevent sticking. Place the patties on the grill and cook for 4-5 minutes per side, or until the internal temperature reaches 165°F. You’ll get those perfect grill marks and a slight crisp on the edges while the inside remains juicy and flavorful.
Step 5: Toast the Buns
While the patties rest, split 4 brioche buns and lightly brush the cut sides with butter. Place them on the grill for 1-2 minutes, just until they’re golden and slightly crispy. Trust me, a toasted bun makes all the difference—it adds texture and prevents sogginess when the toppings are added.
Step 6: Assemble the Burger
Now comes the fun part—building the burger. Start with a generous slather of spicy mustard or horseradish aioli on the bottom bun to complement the kielbasa’s bold flavor. Add your grilled patty, then layer on some sauerkraut, pickled red onions, and a slice of sharp Swiss cheese. Top it all off with the toasted bun, and your Polish Kielbasa Burger is ready to impress.
Ingredients
Let’s round up everything we need to craft this unforgettable Polish Kielbasa Burger. Quality ingredients are key to pulling off this recipe—after all, every bite deserves to be a masterpiece.


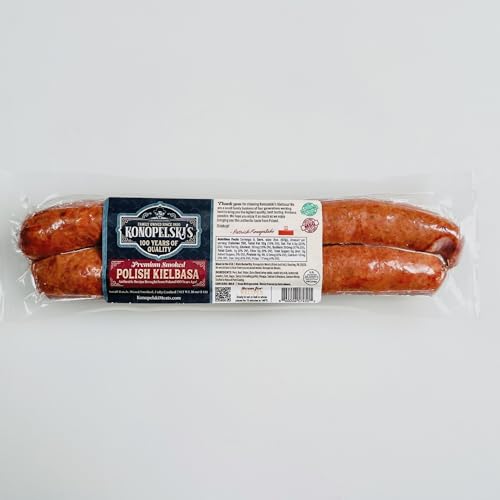

- 1 pound of Polish kielbasa sausage – Remove the casing and finely chop or process it into a ground consistency.
- 1/2 pound ground pork – Adds a tender, juicy texture to complement the kielbasa.
- 1/3 cup breadcrumbs – Helps bind the patties together.
- 1 large egg – For added binding and richness.
- 1 teaspoon garlic powder – Enhances the sausage’s natural garlicky flavor.
- 1/2 teaspoon smoked paprika – Introduces a layer of smoky depth.
- Salt and black pepper to taste – Season to your preference.
- 4 brioche buns – Toasted to golden perfection for a buttery, soft base.
- Swiss cheese slices – Melty and mild, perfect atop the smoky patty.
- 1/2 cup sauerkraut – Drained well for a tangy crunch.
- Pickled red onions – A punch of zing and beautiful color.
- Spicy mustard – A must for tying all the flavors together.
- Butter or oil – For toasting those buns.
Keep these ingredients handy. Trust me, the smoky kielbasa paired with the tangy and savory toppings will be worth every bite.
Tools And Equipment
Creating the perfect Polish Kielbasa Burger requires having the right tools on hand. Here’s what I use to get the job done efficiently while keeping the process enjoyable. Trust me, having these essentials will make all the difference in nailing those smoky, juicy, and flavorful burgers.
Tools You’ll Need:
- Sharp knife: For slicing the kielbasa or trimming any ingredients for toppings. A good, sharp knife is non-negotiable here.
- Cutting board: Essential for prepping everything from the kielbasa and buns to your toppings.
- Mixing bowl: A large, sturdy bowl for combining the kielbasa with ground pork, breadcrumbs, and seasonings to form the patty mixture.
- Burger press or your hands: You can hand-shape the patties, but if you love neat and evenly shaped burgers, a burger press works wonders.
- Grill or cast-iron skillet: I recommend grilling these burgers for that charred flavor that pairs perfectly with kielbasa, but a cast-iron skillet will work great if you’re cooking indoors.
- Spatula: A solid metal spatula will make flipping those patties easier, especially on the grill.
- Toaster or grill pan: You’ll need this for lightly toasting your brioche buns. This step cannot be skipped—it elevates the burger!
- Tongs: Perfect for flipping sausage slices, handling buns, or managing larger items on the grill.
- Cheese melting dome (optional): If you’re grilling, using a dome will help melt the Swiss cheese beautifully over the patties.
- Food thermometer: For ensuring your burgers are cooked to perfection. Look for an internal temperature of at least 160°F for safety.
- Serving platter: Once assembled, you’ll want a sturdy platter to showcase your kielbasa burger masterpiece.
With these tools in your kitchen or grill area, you’re fully equipped to turn ordinary ingredients into burger brilliance. I love how these tools streamline the process, and they make me feel like a burger-making pro every time! Stay organized, and you’ll have more time to enjoy this exciting creation with your loved ones.
Directions
Every great burger starts with a little preparation and a lot of passion. Follow these step-by-step directions to bring this smoky, flavorful Polish Kielbasa Burger to life.
Prep
- Prepare the kielbasa and ground pork mixture: Slice the casing off 1 pound of Polish kielbasa. Dice the meat finely or pulse it in a food processor until it has a ground texture. Combine it in a mixing bowl with 1/2 pound of ground pork.
- Season the meat: Add 1/4 cup of breadcrumbs, 1 large egg, 1 teaspoon of garlic powder, 1/2 teaspoon of smoked paprika, and a pinch of salt and pepper to the bowl. Mix the ingredients gently with your hands until just combined to avoid overworking the meat.
- Shape the patties: Divide the mixture into 4 evenly sized portions. Flatten each portion into a patty about 3/4 of an inch thick. Press a slight indentation in the center of each patty with your thumb to prevent them from puffing up while cooking.
- Prep the toppings and buns: Toast 4 brioche buns on a grill pan or under a broiler until golden. Slice Swiss cheese, portion sauerkraut, and transfer pickled red onions to a small bowl. Set these along with spicy mustard near your cooking station for easy assembly.
Cook
- Heat your grill or skillet: Preheat a grill, cast-iron skillet, or grill pan over medium-high heat. If grilling, lightly oil the grates to prevent sticking.
- Cook the patties: Place the kielbasa patties on the grill or skillet. Cook for 4-5 minutes per side or until the internal temperature reaches 160°F. Flip them once, and avoid pressing them down to preserve their juices.
- Melt the cheese: When the patties are nearly done, place a slice of Swiss cheese on top of each patty. Cover the grill or skillet with a cheese melting dome or lid for 1-2 minutes to melt the cheese perfectly.
Assemble
- Base layer: Spread a generous layer of spicy mustard on the bottom halves of the toasted brioche buns.
- Add the patty: Place each cheesy kielbasa patty on top of the mustard layer.
- Layer the toppings: Add a heaping spoonful of tangy sauerkraut and a handful of pickled red onions atop the patty for a contrasting crunch and flavor burst.
- Top it off: Spread a bit more spicy mustard on the top halves of the brioche buns, then place them on the burger.
- Serve and enjoy: Plate these beauties and serve them while they are hot. Keep napkins close by — these incredible burgers are juicy and loaded with flavor.
Make-Ahead Instructions
I know the excitement of biting into a freshly made burger, but let me tell you, the Polish Kielbasa Burger is also a fantastic make-ahead option. Whether you’re prepping for a backyard cookout or just getting ahead for a weeknight dinner, follow these steps to save time without sacrificing flavor.


Prepping the Patties
- Mix the Meat: Prepare the kielbasa and ground pork mixture as outlined earlier. Combine the breadcrumbs, egg, smoked paprika, garlic powder, and seasoning until everything is evenly distributed.
- Shape the Patties: Use a burger press or your hands to form patties about 1/2 inch thick. Place a sheet of parchment between each patty to prevent sticking.
- Refrigerate or Freeze: If cooking within 24 hours, stack the patties in an airtight container and store them in the refrigerator. For longer storage, transfer the parchment-lined patties to a freezer-safe zip-top bag or container, and freeze them for up to 3 months.
Prepping Toppings and Buns
- Toast and Store Buns: Lightly toast the brioche buns. Once cooled, wrap them tightly in foil and store at room temperature for up to one day.
- Prepare Toppings: Slice or portion the Swiss cheese, sauerkraut, pickled red onions, and spicy mustard. Store these in separate containers in the fridge for easy assembly later.
Cooking from Prepped
- Thaw if Frozen: If the patties were frozen, thaw them in the fridge overnight.
- Grill or Pan-Fry: Cook the patties as outlined, ensuring they reach an internal temperature of 160°F. Add the Swiss cheese once they’re nearly done to get that perfect melt.
- Assemble and Enjoy: With toppings and buns prepped, all that’s left is to layer everything onto the bun. Serve hot and watch the smiles roll in!
Tips For The Perfect Polish Kielbasa Burger
As someone who’s been knee-deep in burger making for years, let me tell you, nailing a Polish Kielbasa Burger takes finesse, but it’s so worth it. Here’s how to ensure your creation stands out every single time.
1. Choose High-Quality Kielbasa and Pork
The stars of this burger are Polish kielbasa and ground pork. I swear by going to a local butcher or a deli known for authentic kielbasa. Look for sausage with a smoky, garlicky aroma and a firm texture. For the pork, stick with an 80/20 fat ratio—it’s juicy and blends perfectly with the kielbasa.
2. Get the Texture Right
Grinding the kielbasa finely is the first step to success. I use my food processor for this, giving it quick pulses until it’s finely chopped but not a paste. Mix it gently with the ground pork, breadcrumbs, and seasonings to avoid overworking the meat, which can lead to tough patties.
3. Let the Patties Chill
Once your patties are shaped, pop them in the fridge for at least 30 minutes before cooking. This not only helps them hold together but also allows the flavors to meld beautifully. Chilling makes the grilling process much easier with fewer chances of breakage.
4. Use the Right Cooking Temperature
Grill or cook your patties over medium heat to prevent burning the exterior while allowing the inside to cook evenly. I aim for an internal temperature of 160°F for the perfect bite. If you’re not using a thermometer yet, trust me, it’s a game-changer for perfecting any burger.
5. Toast Those Buns!
Toasting the brioche buns transforms the whole burger experience. Spread a little butter on each half and toast them on the grill or in a skillet just until they’re golden. That slight crunch with a soft center is unmatched.
6. Layer With Purpose
When assembling, I always think about texture and balance. Start with the spicy mustard on the bottom bun to anchor your flavors. Then add the sauerkraut, patty, melted Swiss cheese, pickled red onions for tang, and finish with the top bun. The order matters—it keeps the burger stable and bursting with that smoky-tangy harmony.
7. Keep Sauerkraut Moist But Not Dripping
Drain the sauerkraut well if it seems too watery. Excess moisture can make the buns soggy, and nobody wants that. A quick blot with paper towels does wonders.
8. Experiment With Grilling
If you’ve got extra kielbasa, grill a few slices as a garnish. I love layering grilled kielbasa on the patty for an extra hit of smoky, garlicky goodness.
9. Serve Right Away
The key to an unforgettable burger is serving it hot off the grill. Prepare your toppings and buns beforehand so you can assemble everything quickly and bring these beauties straight to the table. That first bite is magic, trust me.
10. Don’t Skimp On Toppings
This is where you can make the burger truly yours. Play with the toppings—a dollop of horseradish sauce, crispy fried onions, or even a sunny-side-up egg. It’s all about building layers of flavor that complement the kielbasa.
Serving Suggestions
When that smoky, meaty Polish Kielbasa Burger hits the plate, you’ve got options to elevate the experience even further. Let me share a few winning ideas that have wowed my friends and family at countless backyard cookouts and burger-tasting nights.
- The Traditional Polish Feast Vibe: Serve your burger alongside a hearty helping of creamy potato salad or buttery mashed potatoes with dill. Pair these with a side of tangy, crunchy dill pickles or roasted root vegetables for a true Eastern European feel.
- Casual Backyard Cookout Style: This burger pairs beautifully with classic fries or crispy onion rings. Pro tip: sprinkle your fries with smoked paprika to complement the flavors of the kielbasa. For something lighter, go with a bright side salad with cucumbers and radish slices, tossed in a light vinaigrette.
- Game Night or Movie Night: Keep it casual and fun with a side of soft pretzels and beer cheese dip. The smoky, garlicky notes of the Polish kielbasa burger pair perfectly with the cheesy, salty snack. Add a round of your favorite lager or pilsner for the full effect.
- Something Unexpected: Try serving the burger with a spicy red cabbage slaw on the side or even heaped on top. It adds crunch, color, and a fresh kick that balances the richness of the burger.
- Taste of the Grill: Keep that grill-fired magic going with sides like grilled corn on the cob or charred asparagus. Brush them with a little bit of olive oil and season with kosher salt and pepper—it’s simple but so satisfying.
Conclusion
The Polish Kielbasa Burger is more than just a meal; it’s a flavorful adventure that brings a unique twist to your typical burger night. From the smoky, garlicky kielbasa to the tangy toppings and buttery brioche buns, every bite is packed with personality and charm.
Whether you’re grilling for friends or treating yourself to something special, this burger is sure to impress. It’s all about savoring the process, experimenting with flavors, and sharing the joy of a truly memorable dish.